Here is the Display Tab of the Avatax Settings
Below, you can find a description of each option
Discriminate Freight Charges
- Display total field for Freight: With this checkbox marked you'll make visible the following field in your marketing documents

Below you'll have listed all of your Freights (such as: Freight, Insurance, Shipping, etc.) You'll have to select the ones you want the value to be populated in the "Freight Charge" field.
Important: In case you have "Avatax" Freights, those shouldn't be selected, since it's part of the Tax Calculation (check Avatax Settings - Calculation)
Calculate Tax Button (it moves along with the "Preview tax" button): Here you can select the location and distance of the button in your marketing documents.
By default it's located on the right of Item=16 (Remarks box) and 10 pixels away, and at the top of item=16 and 40 pixels away.
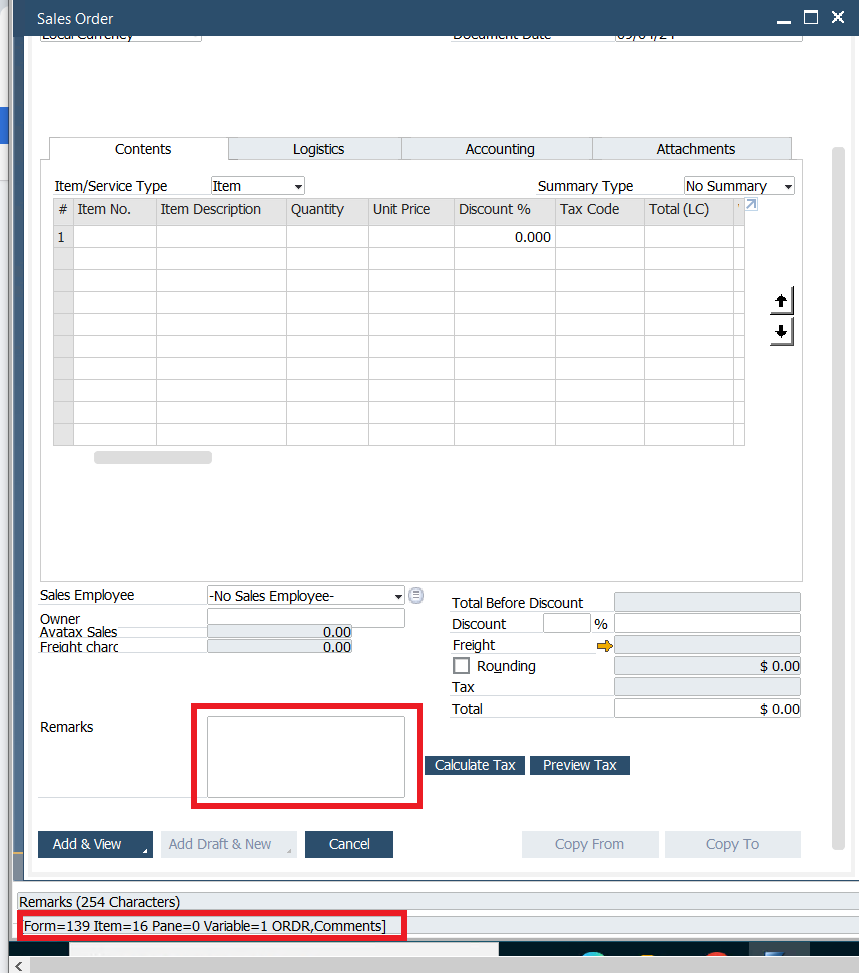
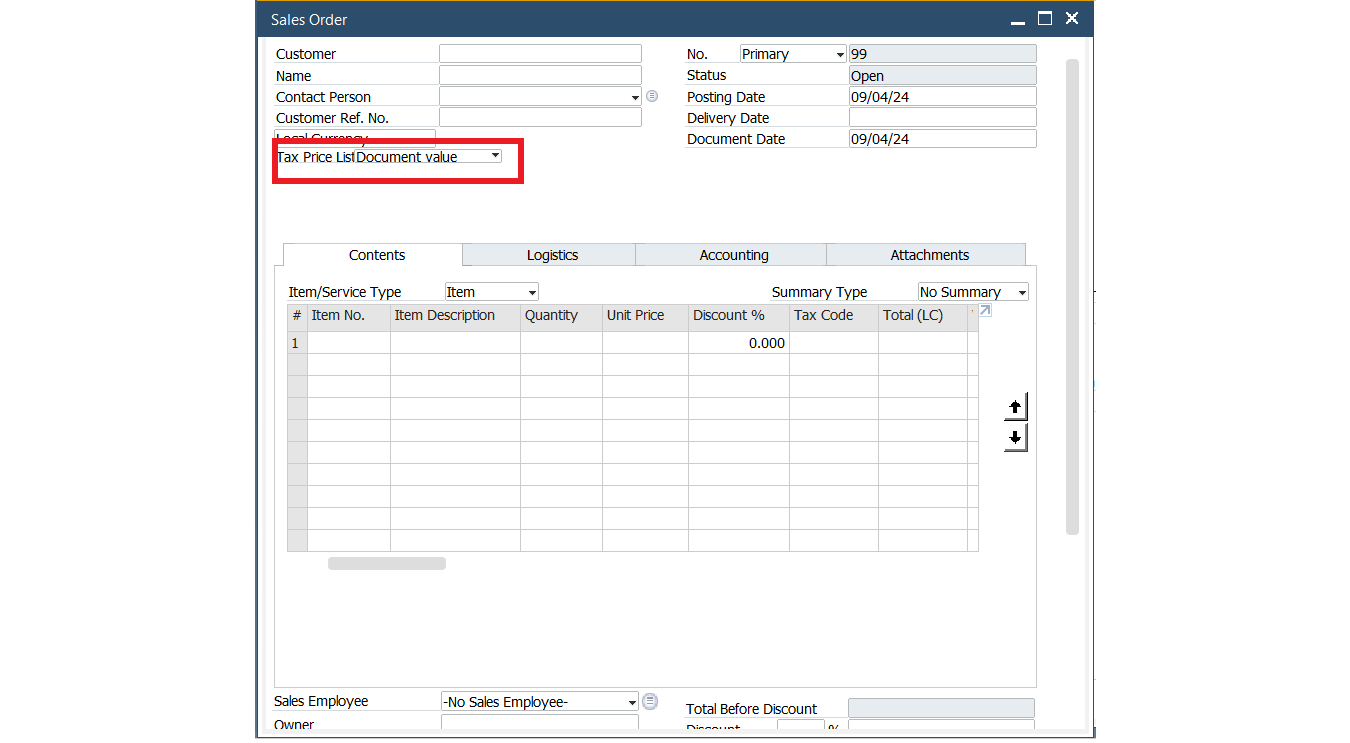
Tax Price Item List: Following the same logic of the option above, here you can select the location and distance of this dropdown in your marketing documents.
By default it's located on the right of Item=16 (Remarks box) and 10 pixels away, and at the top of item=16 and 40 pixels away.
Sales Tax. Sales tax location in form layout:
Setting to relocate the Avatax Sales Tax box and the Freight box.
By default are located below the Owner field.
The setup is similar to other configurable components. Indicate an existing native SAP field in the form as a reference, and set the distances from it.
Native Owner field is Item ID "230". This ID is visible when pointing the mouse over the field and having the SAP menu enabled: View->System Information.
You can locate any reference field and set the new location by changing the Left and Top reference items and the distance from them.

Validate Address Button: Here you can select the location and distance of the button ONLY in the BP Master Data window. With the same logic as the previous option
By default, it's located on the left of Item=2 (Cancel button) and 6 pixels away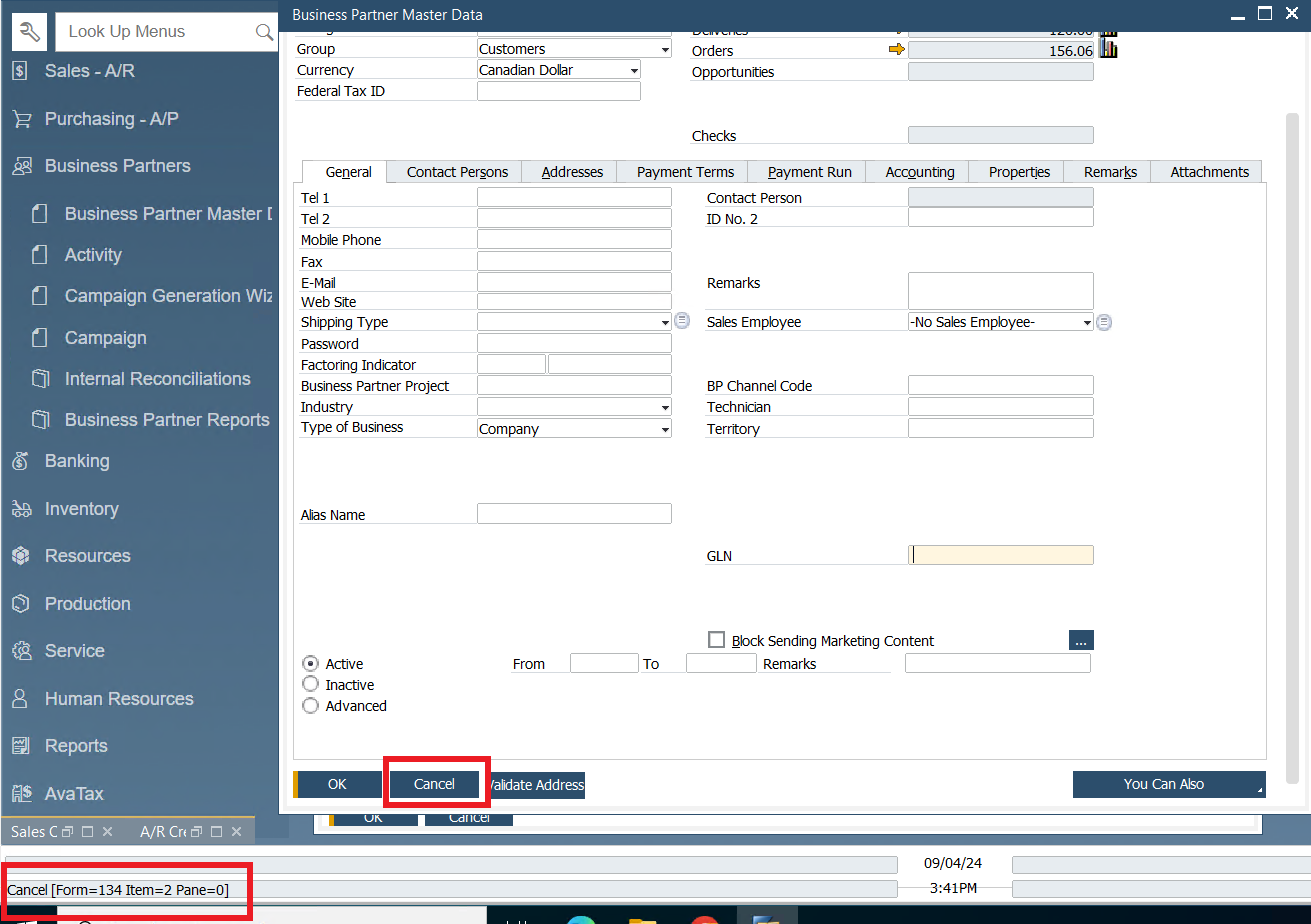
Other Display Settings
- Display Tax Label: With this checkbox marked you'll make visible the following field in your marketing documents

- Hide Price List Selection: With this checkbox marked you'll hide the following field in your marketing documents

- Hide Preview Tax button: you can hide this button if you need it to by clicking this option